
How To Upload Images To A CAPA Competition
Step #1
Images to be uploaded for a competition should meet following specifications, as shown below in Figure 1.

Figure 1 – Summary of image requirement for submission into our competitions.
Step #2
Log on to our website using the appropriate username and password, as shown below in Figure 2.

Figure 2 – Association website login window.
*Special Note – If you are the representative of a camera club, you must log in to the website using your club’s username and password.
Step #3
Navigate to the Competitions Menu, then select EITHER “Competitions” for Clubs OR “Competitions for Individual” as shown in Figure 3 below. If not found, please log in again.
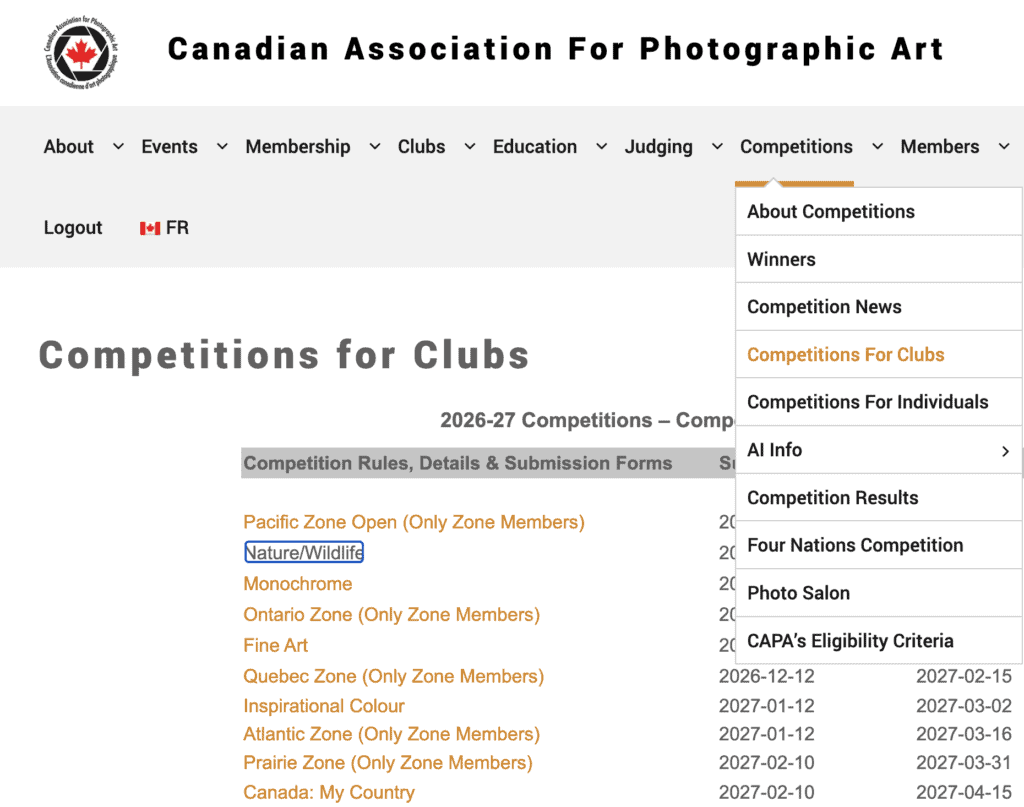
Figure 3 – Select either club or individual and the competition you are entering
Step #4
Click on “Choose File,” and locate the chosen image on your computer, and double-click the “Upload” button, as shown in figure 4 below. An alternative method of uploading your image is to drag and drop it from your computer directly on to the “choose file” button. Note: if your image shows full screen after this, you missed placing it on the “choose file” button and placed it on the browser window instead. Close that browser window and try again.
Club reps need to enter the photographers’ First and Last Names. (We have your club ID from your login).
For the Individuals’ submissions, we have your name from your login.
If there are themes, you must select them from the dropdown menu boxes next to each image.

Figure 4 – Example of the Upload window with mandatory areas highlighted in red.
Step #5
Enter the image’s title in the “Title” field. Do not include the photographer’s name in this field, or anywhere in the title.
Step #6
Fill in the appropriate information in the fields to the right of the Title field (Photographer First Name, Photographer Last Name).
Step #7
Repeat steps 1 through 5 for the remaining images.
Step #8
Click the “Submit” button at the bottom of the upload window and wait for the upload to reach 100%, as shown in Figure 5 below.

Figure 5 – Example of Upload progress bar which has yet to reach 100%.
*SPECIAL NOTE – Once the Upload progress bar has reached 100% then the “Add, Change or Delete” button appears at the bottom of the Upload window, as shown in Figure 6 below.

Figure 6 – Example of “Add, Change or Delete” appearing under all the successfully uploaded images.
Step #9
To modify your upload, or to change or delete an image, double-click the “Add, Change or Delete” button to modify the image details or delete images.
Step #10
Log off the website when finished.
If you have any questions or concerns about our competitions, please do not hesitate in email our Director of Competitions at competitions@capacanada.ca
